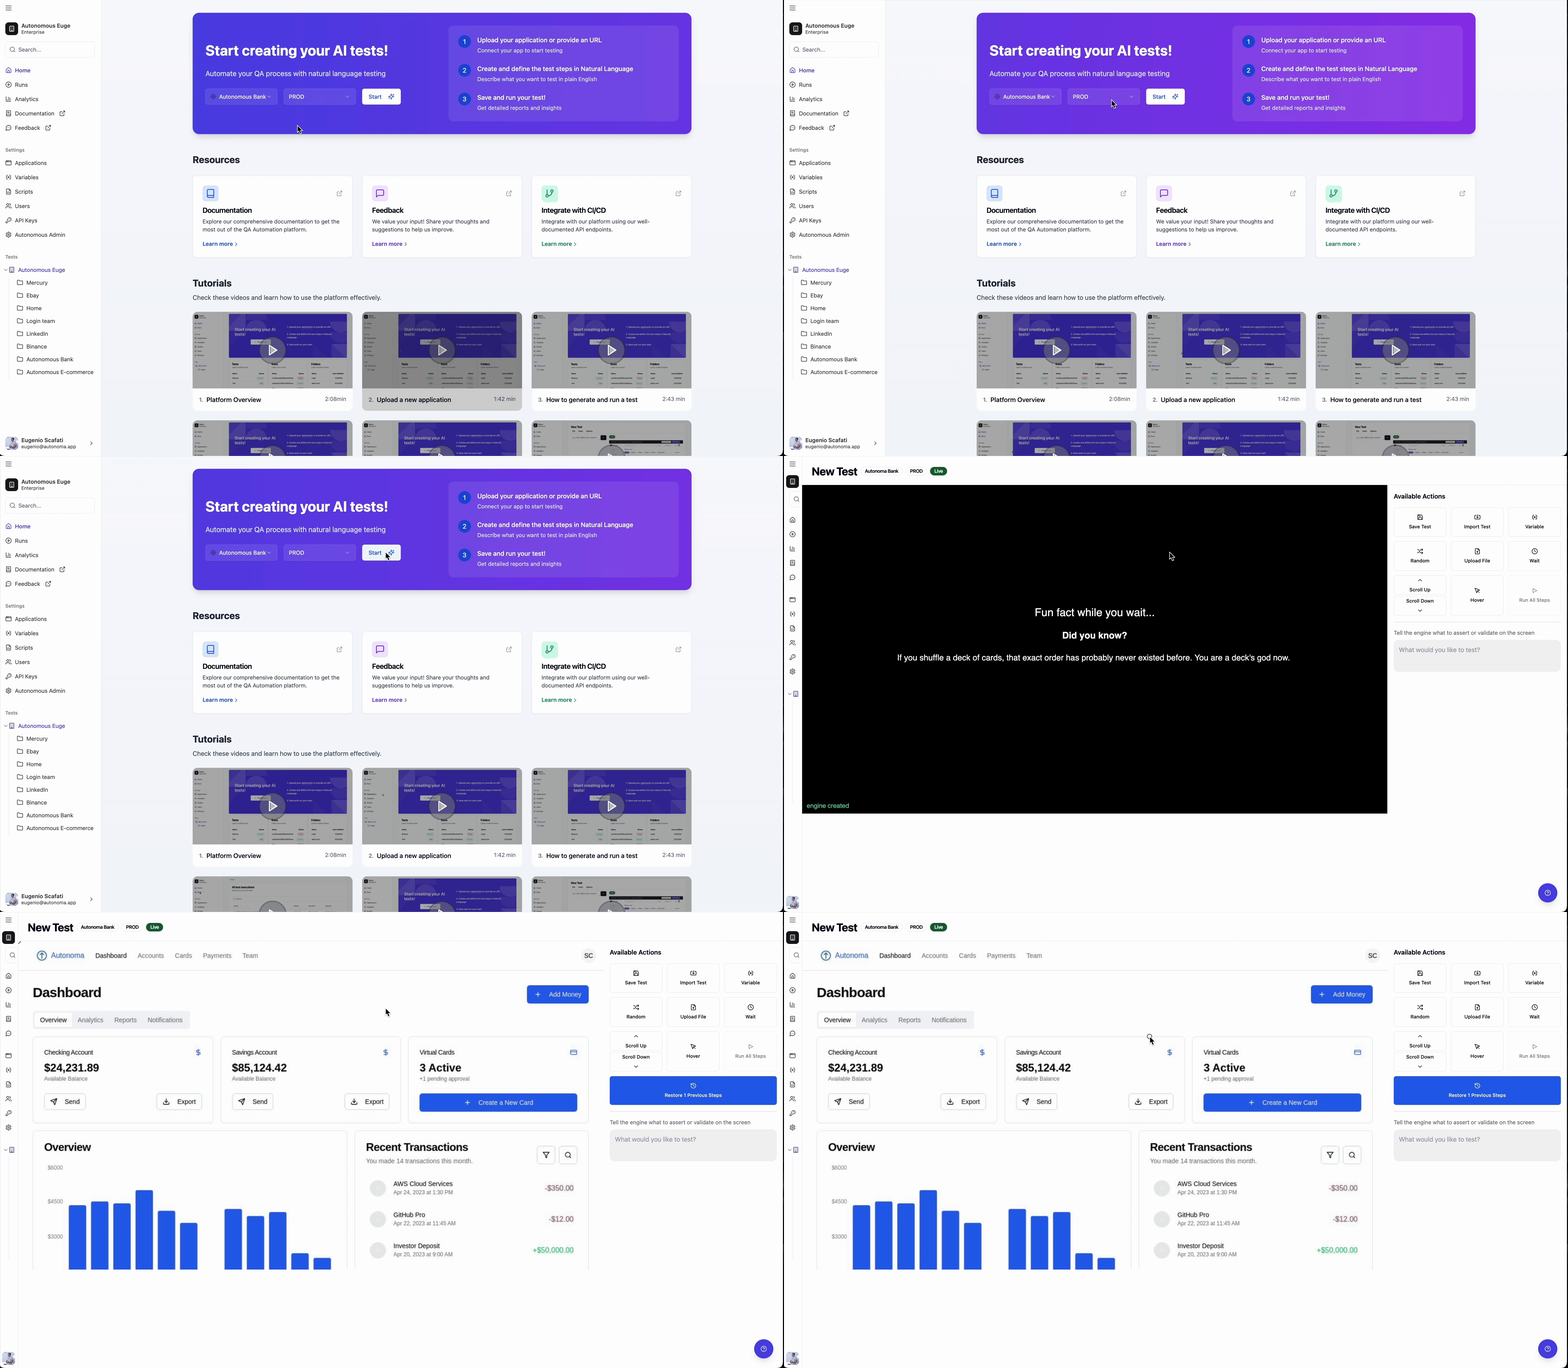
- Select Your Application
Choose the application you want to test from the available list. This allows you to target the correct project for your test scenario. - Choose the Version (for Mobile)
If you’re testing a mobile app, select the appropriate version (e.g., 1.x, 2.x, etc.) to ensure your test runs on the right iteration of the app. - Select the Environment (for Web)
If you’re testing a web application, choose the environment where you want to test. Options include QA, Dev, Staging, or Prod, depending on your deployment setup. - Click Start
After selecting the application, version (if applicable), and environment, simply click “Start” to initiate your testing session.

- For Web Applications, you’ll see a Chromium server streaming your web app, allowing you to interact with it in real-time.
- For Mobile Applications, you’ll see an emulator streaming your mobile app, giving you the same interactive experience as testing on a physical device.
Writing tests
Go to writing tests guide to start building your first test.