

Integration Options
Autonoma supports multiple CI/CD platforms. Choose the one your team uses:GitHub Actions
GitLab CI
Bitbucket Pipelines
cURL (Universal)
What is CI/CD and Why Does It Matter?
CI/CD stands for Continuous Integration / Continuous Deployment—it’s the practice of automatically testing and deploying code changes. Let’s break down what this means in plain language:Continuous Integration (CI)
Traditional approach: Developers work on features for weeks, then try to merge everything together. Often, things break because changes conflict with each other. Continuous Integration: Developers integrate (merge) their code changes frequently—multiple times per day. Every time code is merged, automated tests run to catch problems immediately. Analogy: Instead of writing an entire book and checking for typos at the end (overwhelming!), you check each page as you write it (manageable!).Continuous Deployment (CD)
Traditional approach: After testing, someone manually deploys the code to production—copying files, restarting servers, hoping nothing goes wrong. Continuous Deployment: Code that passes all tests automatically deploys to production. No manual steps, no human error. Analogy: Instead of manually mailing each customer their order, you have an automated system that ships orders as soon as they’re processed.Why This Matters for Testing
Without CI/CD:- Tests are run manually (slow, easy to forget)
- Broken code can sit undetected for days
- Deployments are risky and stressful
- Tests run automatically on every code change
- Problems are caught within minutes
- Deployments become boring and routine (which is good!)
How Autonoma Fits Into CI/CD
Your development workflow probably looks something like this:- Developer writes code
- Developer creates a Pull Request (PR) / Merge Request
- ← Autonoma runs tests here
- Code review happens
- Code merges to main branch
- ← Autonoma runs tests here
- Code deploys to production
- ← Autonoma runs tests here
Prerequisites
Generate your API Key
Go to the API Keys section in your Autonoma dashboard and generate a key. You will see something like this once done. You’ll need:
- Client ID: Your unique identifier
- Client Secret: Your secret key (keep this secure!)
GitHub Actions
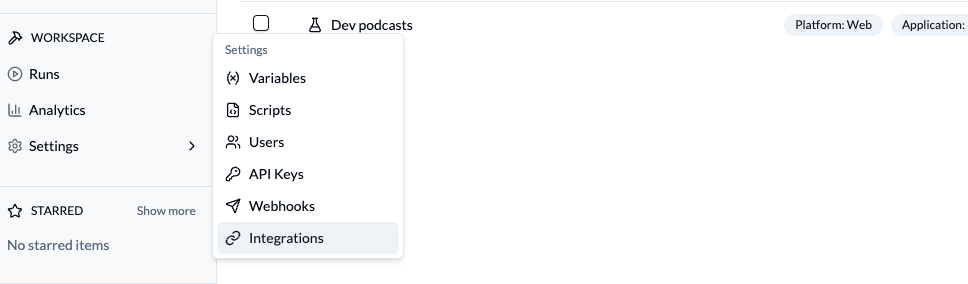
GitHub Actions is GitHub’s built-in automation platform. If your code is on GitHub, this is the easiest option.Step 1: Go to Settings > Integrations in your Autonoma dashboard.
Step 2: Select the tests or folders that you want to run in your CI, copy the generated action job!
Step 3: Add to GitHub Workflow
Copy the action job configuration from the Integrations page and paste it into your GitHub Actions workflow file (.github/workflows/deploy.yml):
Step 4: Set up GitHub Secrets
- In your GitHub repository, go to Settings → Secrets and variables → Actions
- Add your API credentials as secrets:
AUTONOMA_CLIENT_ID: Your client ID from the API Keys sectionAUTONOMA_CLIENT_SECRET: Your client secret from the API Keys section
deploy.yml
Step 5: Customize When Tests Run
The default configuration runs on every push. You can customize this: Run on every Pull Request:How It Works
Once configured:- Developer creates a Pull Request
- GitHub automatically runs your workflow
- Autonoma receives the request and runs your tests
- Results appear in the GitHub PR:
- ✅ Green checkmark if tests pass
- ❌ Red X if tests fail
- Team can see test results before merging
GitLab CI
GitLab CI is GitLab’s built-in automation platform. If your code is on GitLab, use this option.Step 1: Go to Settings > Integrations in your Autonoma dashboard.
Step 2: Add Credentials to GitLab CI/CD Variables
- Go to your GitLab project
- Navigate to Settings → CI/CD
- Expand Variables
- Click Add variable
- Key:
CLIENT_ID, Value: Your Autonoma client ID - Key:
CLIENT_SECRET, Value: Your Autonoma client secret - Check Mask variable (hides it in logs)
- Click Add variable
Step 2: Create GitLab CI Configuration
In your repository, create or edit.gitlab-ci.yml:
.gitlab-ci.yml
FOLDER_ID as an environment variable in GitLab → Settings → CI/CD → Variables.
Customizing GitLab CI
Run only on merge requests:Bitbucket Pipelines
Bitbucket Pipelines is Bitbucket’s built-in automation platform.Step 1: Go to Settings > Integrations in your Autonoma dashboard.
Step 2: Add Credentials to Bitbucket Variables
- Go to your Bitbucket repository
- Navigate to Repository settings
- Click Repository variables (under Pipelines)
- Click Add variable
- Name:
CLIENT_ID, Value: Your Autonoma client ID - Name:
CLIENT_SECRET, Value: Your Autonoma client secret - Check Secured (encrypts the variable)
- Click Add
Step 2: Create Bitbucket Pipeline
In your repository, create or editbitbucket-pipelines.yml:
bitbucket-pipelines.yml
FOLDER_ID in Bitbucket Repository Variables under Repository settings → Pipelines → Repository variables.
cURL (Universal)
If you use Jenkins, CircleCI, Travis CI, or any other CI/CD system, you can use cURL commands directly.What is cURL?
cURL is a command-line tool that makes HTTP requests. It’s pre-installed on most systems and works everywhere. Think of it like this: instead of clicking buttons in a web browser, you’re telling your computer to visit a URL and perform an action.Getting Your cURL Command
You can build the cURL command manually or find it in Autonoma:- Log into Autonoma
- Go to a test or folder
- Click the three dots menu
- Select “Get cURL command”
- Copy the generated command
cURL Command Structure
Here’s a basic cURL command for running tests:curl- The command tool-X POST- Type of request (POST means we’re sending data)--silent- Don’t show progress meter--retry 3- Retry up to 3 times on failure--retry-connrefused- Retry on connection refused--location- Follow redirects--header- Authentication headers|| true- Don’t fail the pipeline if the command fails
Running Different Test Groups
Run tests by folder:Using cURL in Different CI Systems
Jenkins
Add an Execute Shell build step:CircleCI
Add to.circleci/config.yml:
Travis CI
Add to.travis.yml:
Best Practices for CI/CD Integration
1. Run Different Tests at Different Stages
On Pull Requests → Run smoke tests (fast feedback)2. Fail Fast
Configure your CI/CD to stop if Autonoma tests fail:3. Set Up Notifications
Configure notifications so the team knows when tests fail: In Autonoma:- Go to Integrations
- Set up Slack notifications
- Choose which failures to notify about
4. Use Descriptive Job Names
Bad:5. Don’t Over-Test
You don’t need to run your entire test suite on every single change. Smart approach:- Every PR: Smoke tests (5-10 critical tests)
- Before merge: Regression tests (all tests)
- Nightly: Regression tests (catches accumulated issues)
- After deploy: Smoke tests (verification)
Troubleshooting CI/CD Integration
Tests aren’t running
Check:- Is your API token correct?
- Is the token properly stored as a secret/variable?
- Is the workflow/pipeline file in the correct location?
- Are you triggering the right events (PR, push, etc.)?
Tests run but always fail
Check:- Do tests pass when run manually in Autonoma?
- Is the test environment accessible from CI/CD?
- Are there environment-specific issues (URLs, credentials)?
CI/CD times out waiting for tests
Check:- Are you running too many tests? Run fewer tests more frequently
- Is there a timeout configuration in your CI/CD? Increase it
- Are tests stuck on a loading state? Add better waits
Don’t see test results in CI/CD
Check:- Is the cURL command configured to show output?
- Are you checking the right logs/build output?
- Is Autonoma receiving the request? (Check Autonoma dashboard)
Key Takeaways
- CI/CD automates test execution - no manual test running required
- Catch bugs before they reach users - tests run automatically on code changes
- Multiple integration options - GitHub Actions, GitLab CI, Bitbucket, cURL
- Run different tests at different stages - smoke tests for speed, regression for thoroughness
- Fail fast - stop the pipeline if critical tests fail
- Smart testing strategy - don’t run all tests everywhere, be strategic