
Setup Guide
This guide takes you from nothing to a working Environment Factory endpoint at /api/autonoma. Plan for anywhere from 30 minutes to a couple of hours, depending on how many models your app has.
You’ll do eight things:
- Install the SDK in your existing backend
- Pick your scope field
- Generate two secrets
- Create the endpoint
- Register factories
- Implement the auth callback
- Validate
- Go live
1. Install the SDK
The endpoint lives inside your existing backend, next to your other routes. It is not a separate server, sidecar, or standalone process.
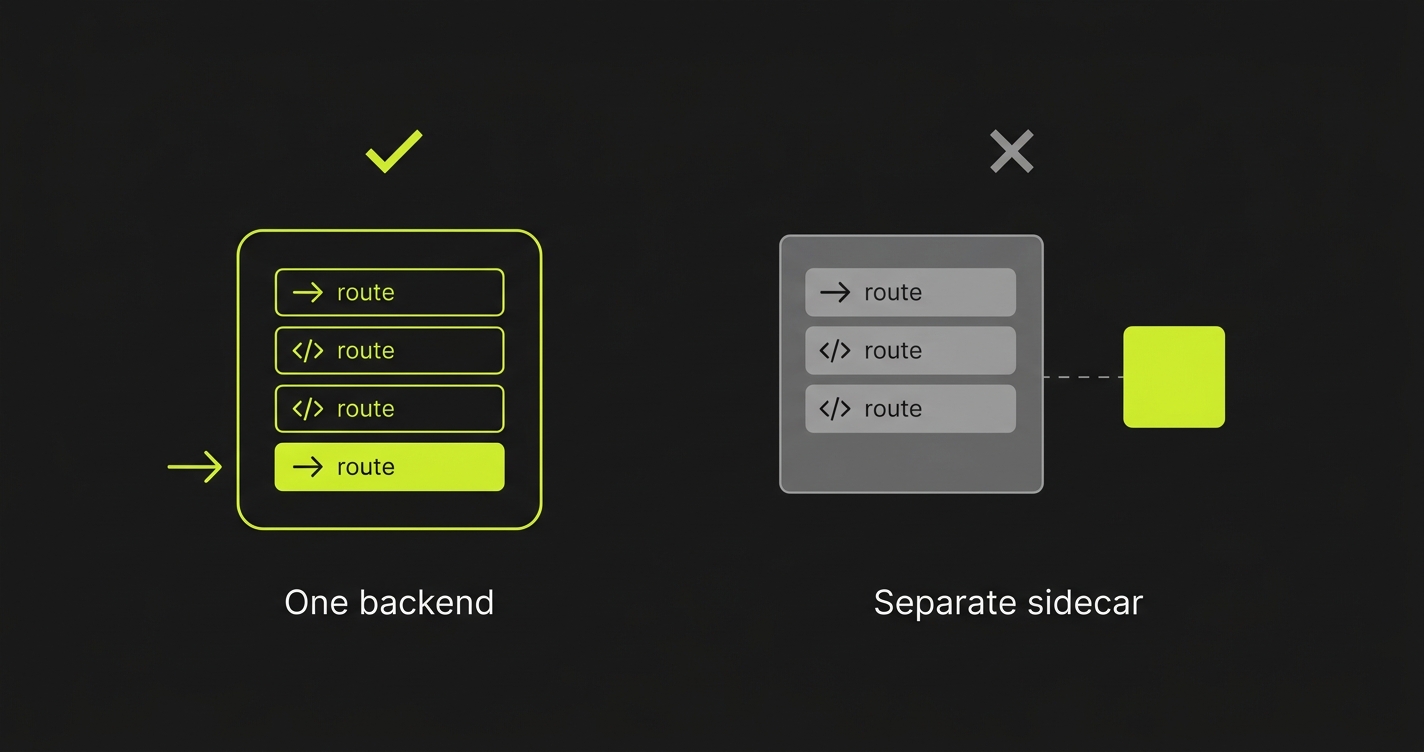
Pick the SDK in the same language as your backend - running a Python sidecar next to a Node app means your test data skips the real auth, hashing, and hooks that ship in production.
Add the core SDK plus the adapter for your framework:
# Next.js App Router, Bun, Deno (Web-standard Request/Response)pnpm add @autonoma-ai/sdk @autonoma-ai/server-web zod
# Express / Fastifypnpm add @autonoma-ai/sdk @autonoma-ai/server-express zod
# Honopnpm add @autonoma-ai/sdk @autonoma-ai/server-hono zod
# Node.js httppnpm add @autonoma-ai/sdk @autonoma-ai/server-node zod| Framework | Adapter package | Handler export |
|---|---|---|
| Next.js, Bun, Deno | @autonoma-ai/server-web | createHandler |
| Express, Fastify | @autonoma-ai/server-express | createExpressHandler |
| Hono | @autonoma-ai/server-hono | createHonoHandler |
Node.js http | @autonoma-ai/server-node | createNodeHandler |
One distribution covers the core SDK and every adapter (autonoma_fastapi, autonoma_flask, autonoma_django). Install it with the extra for your framework so its dependency is pulled in:
pip install "autonoma-ai[fastapi]" # or [flask], [django]| Framework | Handler export |
|---|---|
| FastAPI | create_fastapi_handler |
| Flask | create_flask_handler |
| Django | create_django_handler |
| Your backend | SDK package |
|---|---|
| Go | github.com/autonoma-ai/sdk-go |
| Rust | autonoma-sdk crate |
| Java | ai.autonoma:autonoma-sdk |
| Ruby | autonoma-ai gem |
| PHP | autonoma-ai/sdk |
| Elixir | autonoma hex package |
See Examples for a complete, runnable endpoint in each of these.
2. Pick your scope field
Choose the field most of your models use to reference the root tenant - usually organizationId, orgId, tenantId, or workspaceId.
The SDK doesn’t introspect foreign keys to find this. It just declares the field in the discover response so the dashboard knows how to scope test data. Your factories still own every write, including the tenant column.
3. Generate two secrets
You need two different secrets. The SDK throws an error at startup if they match.
openssl rand -hex 32 # AUTONOMA_SHARED_SECRET - shared with Autonomaopenssl rand -hex 32 # AUTONOMA_SIGNING_SECRET - kept private, never sharedAUTONOMA_SHARED_SECRET=abc123...AUTONOMA_SIGNING_SECRET=def456...The shared secret signs every request between Autonoma and your endpoint. The signing secret signs the teardown token and never leaves your server. See Security for what each one protects.
4. Create the endpoint
Mount the handler at the conventional path /api/autonoma.
import { createHandler } from '@autonoma-ai/server-web'
export const POST = createHandler({ scopeField: 'organizationId', sharedSecret: process.env.AUTONOMA_SHARED_SECRET!, signingSecret: process.env.AUTONOMA_SIGNING_SECRET!, factories: { /* step 5 */ }, auth: async (user) => { /* step 6 */ },})import { createExpressHandler } from '@autonoma-ai/server-express'
app.post('/api/autonoma', createExpressHandler({ scopeField: 'organizationId', sharedSecret: process.env.AUTONOMA_SHARED_SECRET!, signingSecret: process.env.AUTONOMA_SIGNING_SECRET!, factories: { /* step 5 */ }, auth: async (user) => { /* step 6 */ },}))import { createHonoHandler } from '@autonoma-ai/server-hono'
app.post('/api/autonoma', createHonoHandler({ scopeField: 'organizationId', sharedSecret: process.env.AUTONOMA_SHARED_SECRET!, signingSecret: process.env.AUTONOMA_SIGNING_SECRET!, factories: { /* step 5 */ }, auth: async (user) => { /* step 6 */ },}))import osfrom autonoma.types import HandlerConfigfrom autonoma_fastapi import create_fastapi_handler
config = HandlerConfig( scope_field='organization_id', shared_secret=os.environ['AUTONOMA_SHARED_SECRET'], signing_secret=os.environ['AUTONOMA_SIGNING_SECRET'], factories={ ... }, # step 5 auth=lambda user, ctx: { ... }, # step 6)
router = create_fastapi_handler(config)app.include_router(router, prefix='/api/autonoma')Using another framework? Find a complete, runnable endpoint for your stack in Examples.
5. Register factories
Register one factory per model the dashboard can create. Each factory’s input schema (Zod in TypeScript, Pydantic in Python) drives both the discover schema and the validation of incoming data.
import { z } from 'zod'import { defineFactory } from '@autonoma-ai/sdk'
factories: {  Organization: defineFactory({    inputSchema: z.object({ name: z.string(), slug: z.string() }),    refSchema: z.object({ id: z.string(), name: z.string(), slug: z.string() }),    // `data` is typed from inputSchema - no z.infer needed    create: async (data) => organizationService.create(data),    // `record` is typed from refSchema    teardown: async (record) => organizationService.delete(record.id),  }),  User: defineFactory({    inputSchema: z.object({ email: z.string(), name: z.string() }),    create: async (data) =>      userService.create({ ...data, password: 'test-password-123' }),    // no teardown: this model is left alone on `down`  }),}
Always call your real service or repository from create - the same function production uses. That’s what keeps test data honest.
This is the heart of the Environment Factory. Once your first two factories work, read Factories & the create payload to learn how records link together with _alias / _ref and how to tear down dependent rows.
6. Implement the auth callback
The auth callback receives the first User created during up and must return real, working credentials the test runner can log in with.
auth: async (user) => { // user can be null - not every scenario creates a User const session = await createSession(user!.id) return { cookies: [{ name: 'session', value: session.token, httpOnly: true, sameSite: 'lax', path: '/' }], }}There are three patterns - session cookies, bearer tokens, and login credentials. See Authentication for all three.
7. Validate
Before you write a single test, prove that up creates the right data and down removes all of it.
Smoke-test discover with curl:
SECRET="your-shared-secret"BODY='{"action":"discover"}'SIG=$(echo -n "$BODY" | openssl dgst -sha256 -hmac "$SECRET" | sed 's/.*= //')curl -s -X POST http://localhost:3000/api/autonoma \ -H "Content-Type: application/json" \ -H "x-signature: $SIG" \ -d "$BODY" | jq .You should get back your schema - every registered model and its fields, plus scopeField.
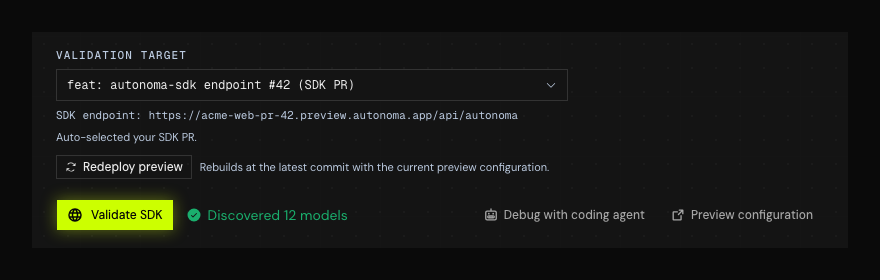
In the dashboard the same check reports back as a model count. That count is the whole confirmation - there is no screen that lists the discovered models or their fields, so use the curl above when you want to read the schema itself.
Run the full lifecycle with checkScenario:
import { checkScenario } from '@autonoma-ai/sdk'
const result = await checkScenario(  factories,  {    create: {      Organization: [{ _alias: 'org', name: 'Test Org', slug: 'test-org' }],      User: [{ name: 'Admin', email: 'admin@test.com', organizationId: { _ref: 'org' } }],    },  },  { scopeField: 'organizationId' },)
// result.valid  - true if up + down both succeeded// result.phase  - 'ok' | 'up' | 'down' (where it failed)// result.errors - [{ phase, message, fix? }]
Then confirm three things by hand:
- After
up- the expected records exist with the right values. - After
down- every created record is gone, no orphans. - Auth works - the returned cookies or headers authenticate a real request.
8. Go live
Nothing to switch on. The endpoint is always enabled - HMAC signing is the gate, so it serves nothing without the shared secret. On Autonoma preview environments (AUTONOMA_PREVIEWKIT is set in every preview) that’s the whole story: previews are isolated and never production. If you deploy the factory in your own environments, add the production guard yourself - mount the route only outside production:
if (process.env.NODE_ENV !== 'production') { app.post('/api/autonoma', createHandler({ ... }))}See Security & Troubleshooting for the full three-layer model.
Connect to Autonoma. Deploy your endpoint and set the same AUTONOMA_SHARED_SECRET in your deployment secrets. Autonoma then calls discover to learn your schema, generates scenario data, and sends up / down around every test run.