
Preview environments
Preview environments give every pull request its own live, isolated, full-stack preview of your app. They're the foundation Autonoma reviews run against - and the first thing you set up when you connect a repo.
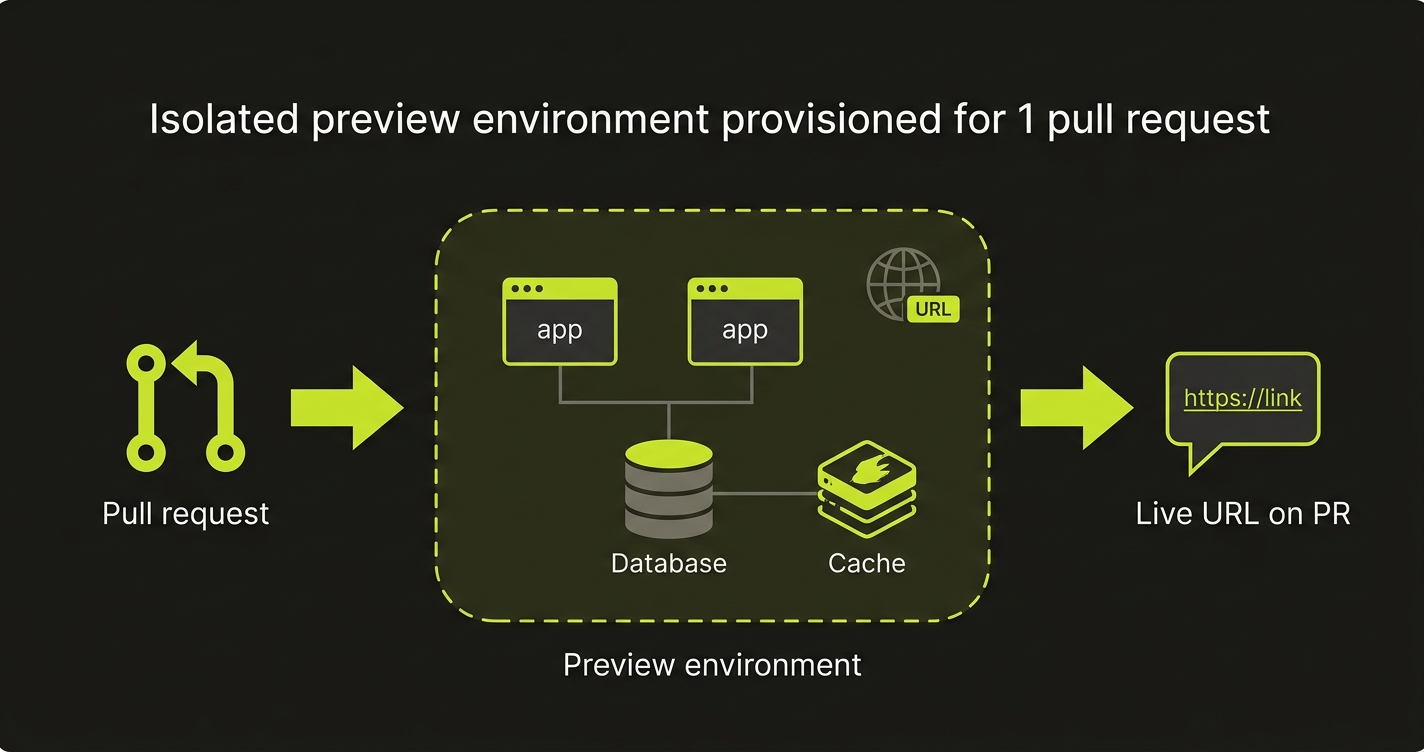
You describe your stack once - apps, the databases they need, and their environment variables - and Autonoma handles the rest: building the containers, provisioning the databases and extra services, running setup tasks, wiring environment variables, and posting the URL back to the PR.
How it works
Once the Autonoma GitHub App is installed on your repository, every pull_request event triggers the pipeline:
- Opened / synchronized / reopened - Autonoma fetches the head commit, builds each app, provisions the databases and extra services it needs, runs the database setup tasks, deploys to a dedicated Kubernetes namespace, and comments the preview URL on the PR.
- Ready for review - a draft PR gets no preview by default, so marking it ready is what first builds one.
- Closed - Autonoma deletes the namespace and all resources tied to that PR, then updates the comment.
Draft pull requests are skipped deliberately, to avoid building a preview for work still in progress.
Each preview gets a stable, unguessable URL - a short hash derived from the service name, PR number, and repo, so the same PR always resolves to the same address. One PR may expose several apps, each with its own hostname under preview.autonoma.app.
A repository can also have a standing main-branch environment: a preview deployed from the repository’s main branch instead of a PR. Once it exists, every push to that branch redeploys it at the new head automatically, the same way a new commit updates a PR’s preview.
What you configure
You set up your stack in the Autonoma dashboard (the preview environment onboarding flow), which saves the configuration for your repository. The flow leads with a coding agent: pair your agent to the app and it fills the configuration in for you, while you watch read-only. See Set up a preview with a coding agent for that path - the rest of this section describes what it is configuring, and applies either way.
To fill it in yourself, decline the agent twice: Answer a few questions instead on the preview step (a short questionnaire about your stack, which is what routes you to this path), then Configure manually on the config step that follows. The manual flow has three required steps - Apps, Database, and Variables - plus two optional pieces most projects never need. A final Finish screen confirms the configuration, where Save and deploy builds it. It declares:
- Apps to build and deploy (each becomes a public HTTPS URL) - see Apps and builds
- Databases the apps need (Postgres, MySQL, MongoDB, Redis / Valkey), each with guided setup for schema, seed data, and migrations - see Databases
- Variables - environment variables and secrets for each app and database, with templates that resolve hostnames at deploy time and a per-variable Source control choosing whether a value is a stored secret or a connection to something else in the preview
- Extra services (optional) - non-database Docker images like Sentry or an OTel collector - see Extra services
- Lifecycle hooks (optional) - commands that run around each deploy - see Lifecycle hooks
Extra services and lifecycle hooks sit off the main path: the flow finishes at Variables, and you reach them only if your setup needs them.
The setup flow, end to end
Connecting a repository walks through three phases, shown across the top as Create app, Config previews, and Test data:
| Phase | What happens |
|---|---|
| Create app | Install the Autonoma GitHub App, pick the repository, and name the application. |
| Config previews | A short set of questions works out which setup fits - whether you already deploy previews per branch, where your backend runs, and how your data is scoped. From there you either connect deploys you already have, or configure PreviewKit to build them. Then Autonoma deploys one and verifies it is reachable. |
| Test data | Upload test artifacts with the planner, implement the Environment Factory, and dry-run your scenarios. |
The button to know about is Start generating tests, at the end of Config previews. Pressing it does two things at once: it takes the app live, so Autonoma begins reviewing pull requests, and it moves you into the Test data phase. There is no separate screen that turns reviews on.
It does not end onboarding. Test data is the third phase of the same flow, and it is what lets Autonoma provision real data for your tests. Onboarding is one continuous flow with no way out until all of it is done, so plan to run it in one sitting - and note that the planner upload alone usually takes over an hour, since it reads your whole codebase to generate the suite.
How apps are built
Each app builds one of two ways, chosen per app:
- Manual - pick a runtime (Node, Python, Go, and more), then write a short bash build script and an entrypoint. No Dockerfile required.
- Dockerfile - point Autonoma at an existing Dockerfile in your repo, built with BuildKit.
Either way, images are pushed to a private registry and pulled by the preview cluster - you never touch credentials. See Apps and builds for the full reference.
Secrets
Secrets such as API keys and third-party tokens are stored encrypted and kept out of your stack configuration. Flag any value as a secret with the Source control in the onboarding Variables step, or manage them out-of-band via the REST API (handy for CI and rotating values without editing the config). A secret belongs to an application (or to the organisation), and every preview of that application sees it - there is no per-PR scoping. Autonoma also injects a few built-in environment variables (AUTONOMA_PREVIEWKIT, AUTONOMA_PREVIEWKIT_PR, AUTONOMA_PREVIEWKIT_URL) into every preview so your app can detect it’s running in a preview. See Secrets.
What’s next
- Apps and builds - build methods, runtimes, and per-app settings
- Databases - engines, guided setup tasks, and where they run
- Extra services - non-database side containers
- Lifecycle hooks - commands that run around each deploy
- Multiple repositories - pull apps from more than one repository
- Manage secrets - REST API reference
- Use your own deploys - connect previews your pipeline already builds